
Virage timing chain tensioner and guide replacement
The Virage of our friend J, started a very loud rattling/tapping from the front of the engine. This sounded very serious indeed. Listening with a stethoscope showed it was coming from the front of the engine, so it seemed to be the timing chain. The repair was cheap, but quite complex.
To inspect what’s going on you need to remove the timing chain cover. The bolts on the front can be removed quite easily. However there are additional bolts that run through the sump from below in to the bottom of the timing cover. To access these, the car needs to be jacked up, and the bolts removed. These bolts can be hard or impossible to remove (often the case with steel bolts in an aluminium housing). In this case one of them was solid, and could not be freed with an induction heater or an oxy torch torch. Ithad to be cut. On two others a slot ad to cut in the sump to free the bolt.
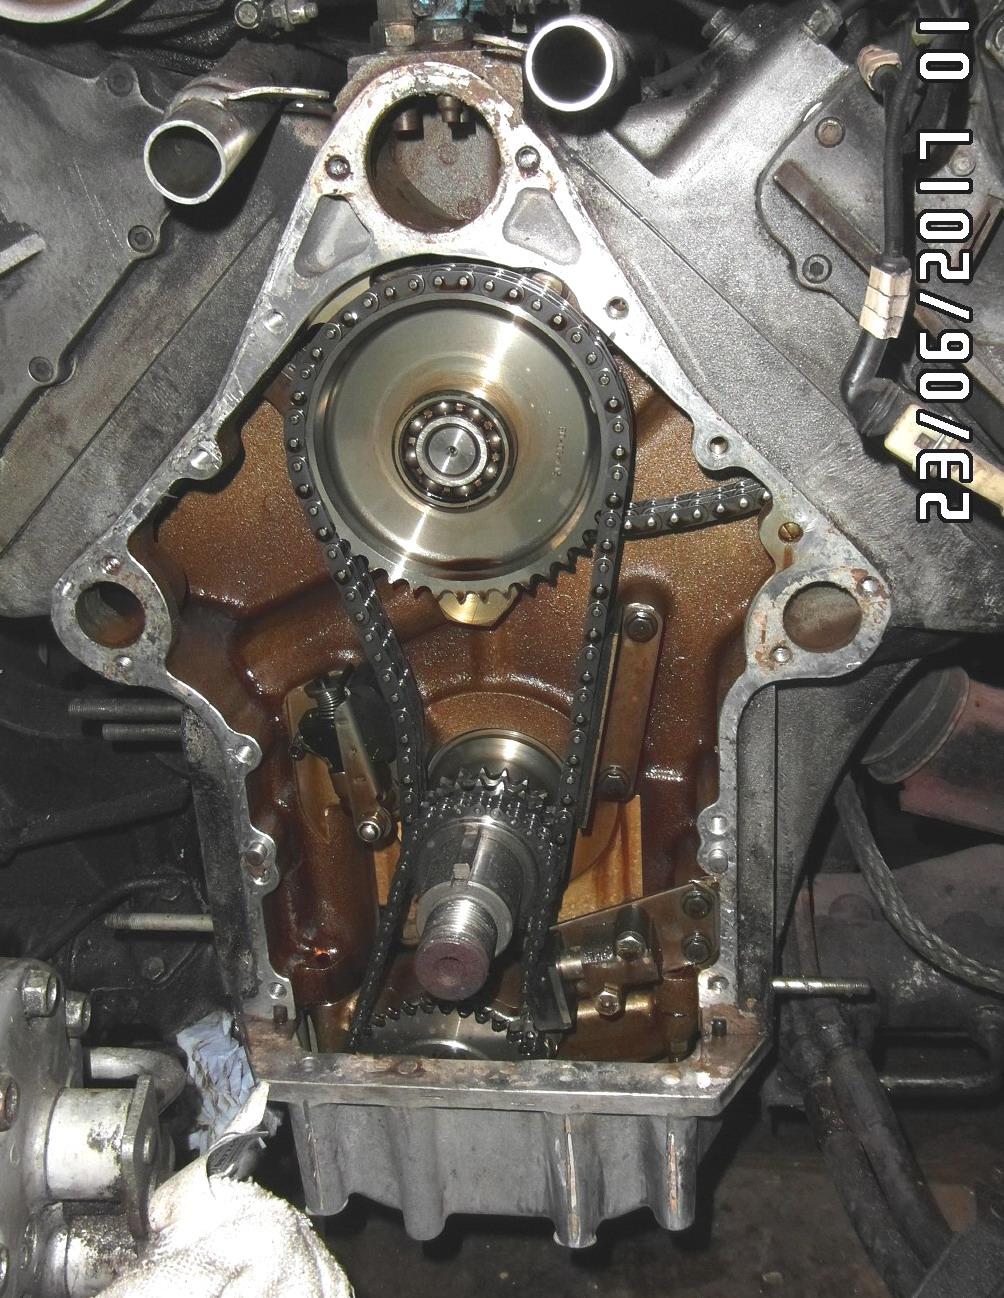
Here’s a closer view of the removed timing cover. You can see one of the bolts had to be cut through.
The slots in the sump case that had to be cut to free two other bolts are shown below

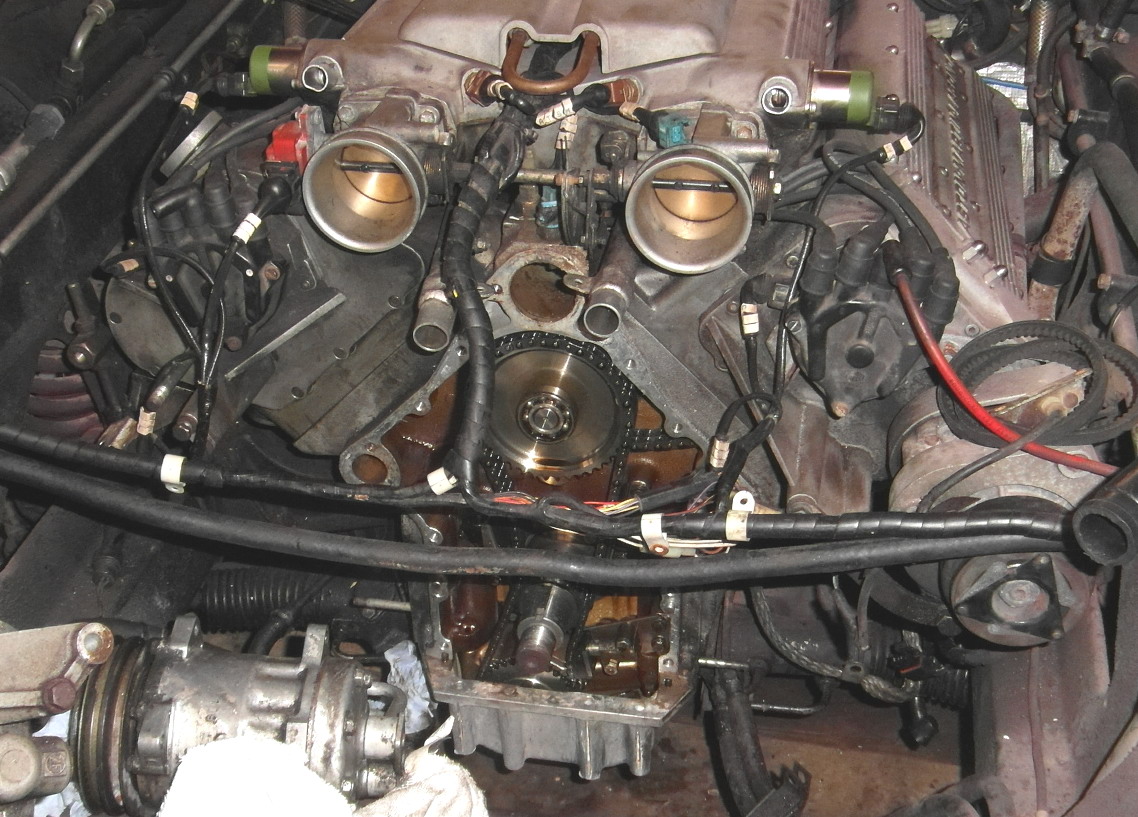
Once open the problem looked like the oil pump, but the chain was still under tension. Closer inspection showed that the chain on the right hand camshaft was hanging loose, and their were pieces of the chain guide in the base of the housing. So the problem appeared to be the chain tensioner on the right hand side.
To get to the tensioner, the plenum chamber has to be removed. This is not an easy job, but instructions are given here (from the vacuum pipe replacement section). The rocker cover then also has to be removed to get access to the timing chain tensioner. These links give scematics of the timing chain case, and the cylinder head assembly (including tensioners).
Once removed, the cap of the chain tensioner can be removed, which is held with two bolts. Removing these allows the tensioner to be removed. In this case, the problem was the cap itself (top left in the photo below). This was badly worn and as a result the tensioner rotation to ratchet up the chain tension no longer working. The looseness of the chain then smashed the guide. The broken parts are shown below, with their replacements.
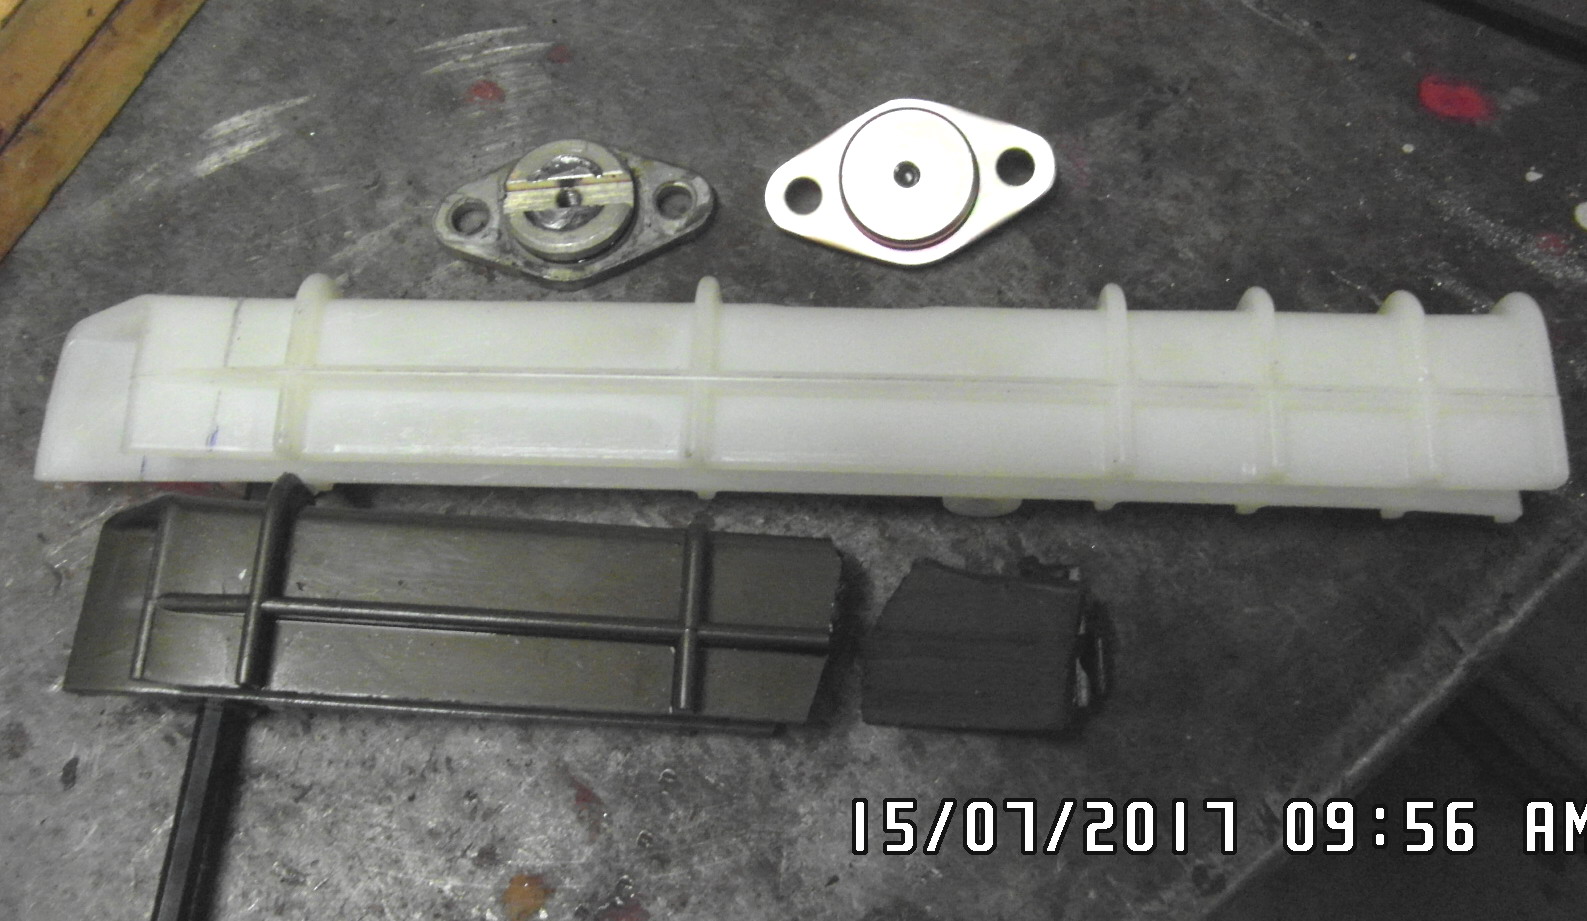
The replacement (top right in photo) does not have the machined slot in it and is clearly a redesigned part. It was ordered from Aston Workshop and was not expensive. Below is the new chain guide (white) with the broken one (black) below. The plastic chain guide new from Aston is around £160. G searched around and found a Febi BMW chain guide with identical fixing centres for about £7 . Look for “New Genuine Febi Bilstein Timing Chain Guide 07713 Top German Quality” on eBay.
The new guide is a different length but can be cut to size using the old parts as a template. While fitting the new guide the crankshaft and camshaft must not be moved or valve timing will be altered. Mark the chain positions on the sprockets and the sprocket positions on the block. Lock the camshaft by loosening one of the bearing caps, slipping a piece of thick paper under the cap and re tightening the cap. Don’t forget to remove the paper when the cam sprocket has been refitted.
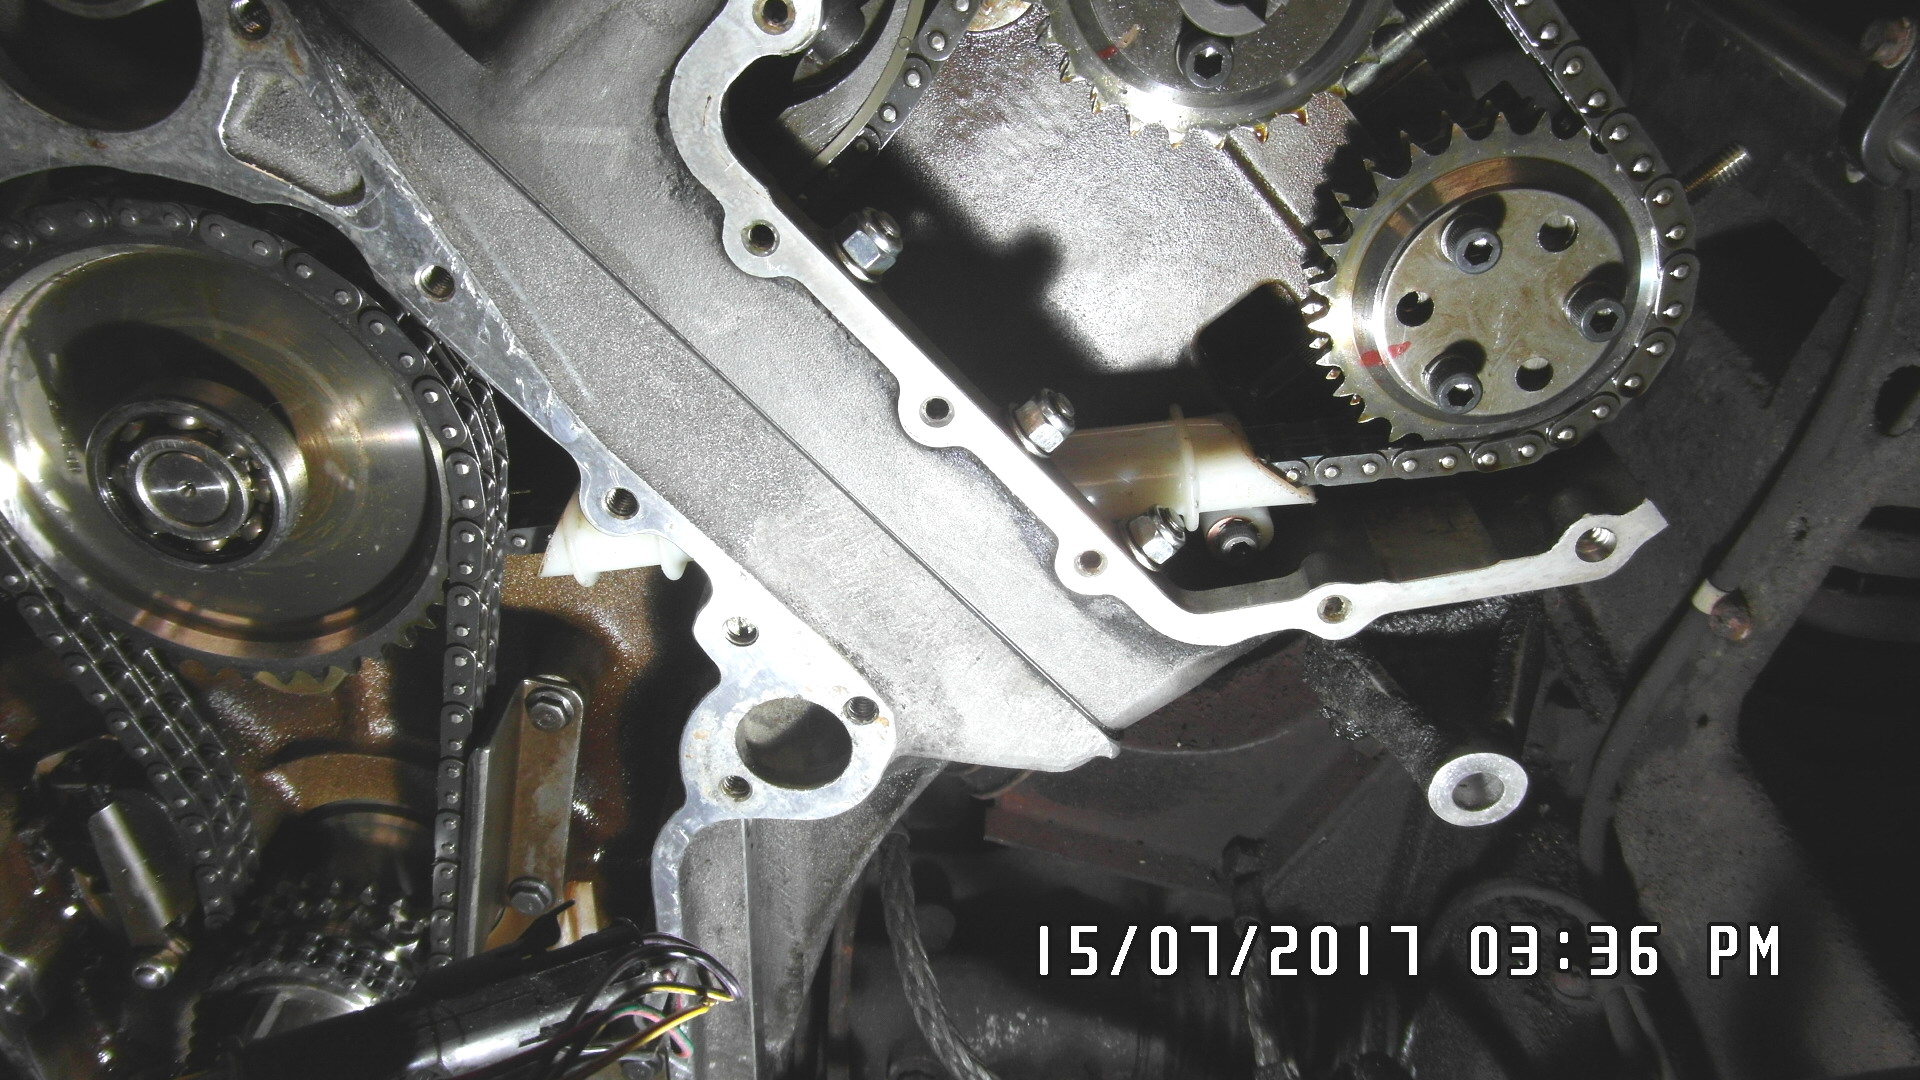
The completed assembly with the new chain guide in place is shown here.